


| The Process | How to Accomplish The Task |
|---|---|
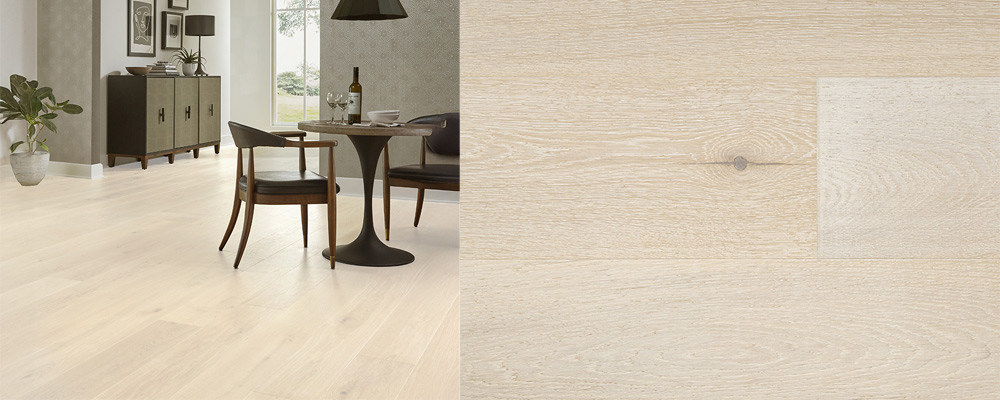
| Project Goal | To create a bright, semi-transparent white finish on hardwood floors that lightens the room while bringing the natural wood grain to show through. |
| Key Materials |
|
| Critical Steps |
|
| Estimated Timeline | 4 to 7 days for an average-sized room, including necessary drying times for stain and sealant coats. |
| DIY vs. Professional | A rewarding DIY project for those willing to invest the time and labor. However, hiring a professional is recommended for the best quality finish and to avoid costly mistakes. |
| Crucial Pro Tip | Always use a water-based, non-yellowing polyurethane sealer. Oil-based products will turn yellow over time and ruin the bright white look of the floor. |
| Long-Term Maintenance | Clean regularly with a soft broom or vacuum brush. Use pH-neutral hardwood floor cleaner for deep cleaning. Use felt pads on furniture and clean up spills immediately. |
Transform your home with the bright, airy, and modern aesthetic of whitewashed hardwood floors. This timeless technique has captured the hearts of homeowners seeking to create spaces that feel both sophisticated and welcoming. Unlike traditional dark wood finishes, whitewashed floors reflect light beautifully. This clean reflection makes rooms feel larger and more open while maintaining the natural character and grain pattern of the wood.
Whitewashed hardwood floors offer a fresh, modern alternative to traditional dark wood finishes. If you are choosing a new floor instead of refinishing an existing one, white oak hardwood flooring offers a naturally light, versatile foundation for this look. This technique creates a translucent white coating that allows the natural grain to shine through while dramatically brightening your space. The result? Rooms that feel larger, more open, and filled with light—perfect for modern farmhouse, coastal, Scandinavian, or minimalist interiors.
Let's walk through every step of the whitewashing process, from initial preparation to keeping the new finish looking its best. This project can brighten a dark living room, add a calm coastal feeling to a bedroom, or modernize older floors throughout a home. Whitewashing offers an affordable way to achieve dramatic results if you are ready for the work involved.
The benefits of whitewashed hardwood floors extend beyond aesthetics. They complement various design styles including modern farmhouse, coastal, Scandinavian, and minimalist decor. Plus, this technique can breathe new life into worn or outdated floors without the expense of complete replacement.
Featured Whitewashed Flooring
What Are Whitewashed Floors and Why Are They So Popular?
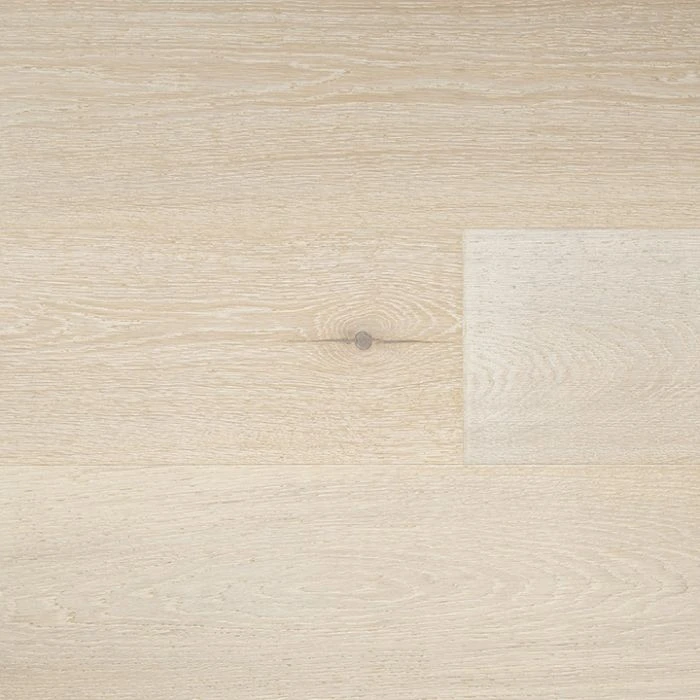
Whitewashing is a semi-transparent finishing technique that lightens a wood's color toward a whiter tint. This process still preserves the natural grain and texture of the hardwood. Unlike painting floors solid white, which completely covers the wood's character, whitewashing creates a translucent effect that allows the underlying wood grain to show through. This technique produces a soft, weathered appearance that adds depth and visual interest to your floors.
The popularity of whitewashed floors stems from their versatility and current decor trends. This finish technique has been used for centuries, originally as a practical way to protect and brighten interior surfaces. Today, it's experiencing a renaissance as homeowners embrace lighter, more natural design elements in their homes.
Whitewashed floors complement several popular design styles:
- Modern Farmhouse: The technique captures a rustic yet refined look, creating floors that feel contemporary and rooted in tradition.
- Coastal Design: Whitewashed floors give a space the appearance of bleached driftwood and a sandy beach.
- Scandinavian Style: The light, airy quality aligns with the minimalist principles and natural elements of increasingly popular Nordic design.
- Minimalist Interiors: The subtle finish provides a clean backdrop that does not compete with furniture or decor.
This works particularly well in rooms with limited natural light, as the lighter surface reflects available light and creates the illusion of a much brighter space.
Step 1: Preparation and the Importance of Proper Floor Sanding
Safety First
Before beginning any floor refinishing project, prioritize safety by gathering the necessary protective equipment:
| Safety Equipment | Purpose |
|---|---|
| Safety goggles | Protect eyes from dust and debris |
| N95 or P100 respirator mask | Prevent inhalation of fine wood or urethane particles |
| Work gloves | Protect hands from splinters and chemicals |
| Knee pads | Provide comfort during floor-level work |
| Hearing protection | Shield ears from loud sanding equipment |
The Room Prep
Proper preparation sets the foundation for professional-looking results. Start by completely emptying the room of all furniture, rugs, and decorative items. Remove or protect light fixtures and ceiling fans from dust accumulation.
Apply painter's tape along baseboards and wall edges to protect surfaces from accidental staining. Cover doorways leading to other areas of your home with plastic sheeting to contain dust. Ensure adequate ventilation by opening windows and setting up fans to circulate air throughout the workspace.
Inspect the floor carefully for protruding nails, loose boards, or damaged areas that need repair before sanding begins. Address these issues now to avoid complications later in the process.
The Sanding Process
Sanding represents the most critical step in achieving professional whitewashing results. This process removes old finishes, smooths imperfections, and opens the wood's pores to accept the new stain evenly.
Floor sanding on solid wood and sanding engineered wood floors are two different things. Some engineered options have such thin wear layers that sanding them could ruin them. Read more about this on our sanding and refinishing an engineered hardwood blog here.
Why Sanding is Non-Negotiable
Skipping or inadequately performing the sanding step will result in uneven stain absorption, blotchy appearance, and poor adhesion of the final protective coating. The sanding process creates the smooth, uniform surface necessary for the whitewash to penetrate consistently across the entire floor.
Choosing the Right Sander
For most DIY projects, an orbital sander provides the best balance of effectiveness and user-friendliness. These sanders are easier to control than drum sanders and less likely to create gouges or uneven surfaces. However, for heavily damaged floors or large areas, you might consider renting a professional drum sander.
Sanding Grit Progression
Follow a systematic approach to sanding, progressing through increasingly fine grits:
- Coarse Grit (60-80): Start with coarse grit to remove old finish and address major imperfections
- Medium Grit (80-100): Smooth out scratches left by coarse grit while continuing to level the surface
- Fine Grit (100-120): Create the final smooth surface that will accept stain evenly
Always sand in the direction of the wood grain, never against it. Overlapping passes ensure even coverage, and maintaining steady, moderate pressure prevents gouging.
Post-Sanding Cleanup
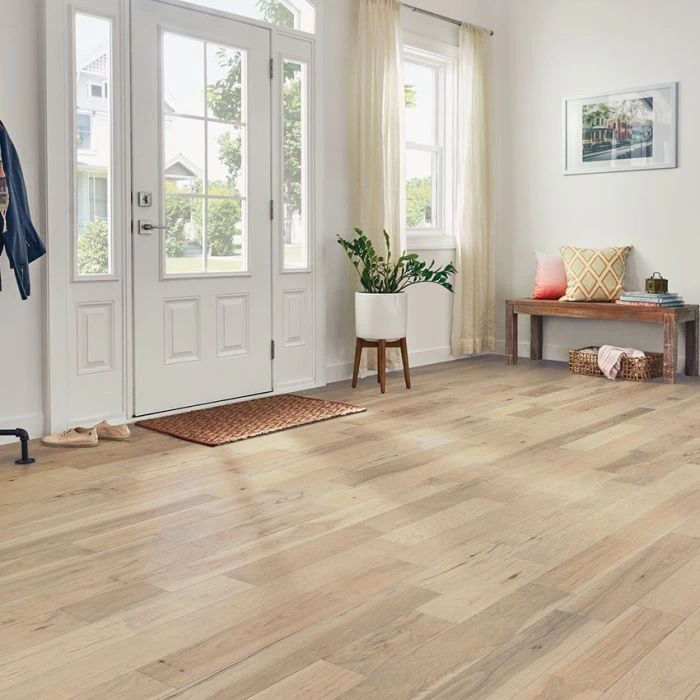
Thorough cleanup after sanding is essential for optimal stain adhesion. Begin by vacuuming the entire floor with a shop vacuum, paying special attention to corners and edges where dust accumulates. Follow up with a tack cloth to remove fine particles that vacuuming might have missed. The floor should be completely dust-free before proceeding to the staining step.
Step 2: Applying the Stain to Your Wood Floors
Choosing Your Product
You have several options for creating the whitewash effect, each with distinct advantages:
DIY Water-Based Mixture: Combine white latex paint with water in a 1:1 or 1:2 ratio, depending on the desired opacity. This economical option allows for easy customization of color intensity.
Commercial Whitewash Stain: Purpose-made products offer consistent results and often include additives that improve penetration and durability.
Pickling Stain: Specifically designed for lightening wood, pickling stains provide excellent coverage and come in various opacity levels.
Testing Your Stain
Never apply stain directly to your main floor without testing first. Use a spare piece of matching wood or test in an inconspicuous area like a closet corner. Apply the stain using your planned technique and allow it to dry completely. This test reveals the final color and opacity, allowing you to adjust the mixture if necessary.
Consider testing multiple dilution ratios to find the perfect balance between coverage and grain visibility. Document your successful mixture ratios for consistent application across the entire floor.
Application Technique
Working in Manageable Sections
Divide your floor into workable sections of approximately 3-4 square feet. This approach prevents the stain from drying before you can properly work it into the wood and wipe back excess material.
Application Tools
Choose between rags and brushes based on your preference and the stain consistency. Natural bristle brushes work well for thicker stains, while lint-free rags excel with thinner mixtures. Some professionals prefer foam brushes for their smooth application and disposable convenience.
The Apply and Wipe Back Method
This technique is crucial for achieving the desired translucent effect:
- Apply stain liberally in the direction of the wood grain
- Allow 2-3 minutes for penetration
- Use a clean, dry rag to wipe back excess stain, again following the grain direction
- Adjust wiping pressure to control opacity - heavier wiping removes more stain for a lighter effect
Working with the Wood Grain
Always apply and wipe stain in the direction of the wood grain, never against it. This practice ensures smooth, even coverage and prevents the creation of cross-grain scratches that become visible under the final finish.
Work systematically across the room, maintaining a wet edge where possible to avoid lap marks between sections. If you must take breaks, complete entire boards before stopping to ensure uniform appearance.
Step 3: Sealing Your New Finish
Why Protection is Essential
A protective topcoat serves multiple critical functions in preserving your whitewashed floors. It shields the stain from wear, prevents moisture damage, and makes routine cleaning more effective. Without proper sealing, your beautiful whitewash finish will quickly deteriorate under normal foot traffic.
The protective coating also prevents the stain from rubbing off onto furniture, rugs, or clothing, which can occur with unsealed finishes. Additionally, the right sealant enhances the overall appearance by adding depth and richness to the whitewashed surface.
Choosing the Right Sealant
Selecting the appropriate sealant is crucial for maintaining the white color of your floors over time. Oil-based polyurethanes, while durable, tend to yellow as they age, which will compromise the bright, clean appearance you've worked to achieve.
Water-Based Polyurethane Benefits:
- Maintains true color without yellowing
- Dries quickly, allowing faster project completion
- Low odor and lower VOC emissions
- Easy cleanup with soap and water
- Available in various sheen levels from satin to high gloss
Choose a high-quality, non-yellowing water-based polyurethane specifically designed for hardwood floors. These products offer excellent durability while preserving the whitewashed aesthetic.
How to Apply the Sealant
Surface Preparation
Ensure the stained surface is completely dry before applying sealant. Check manufacturer recommendations, but typically allow 24 hours for full stain drying. The surface should be clean and free from dust, footprints, or other contaminants. Remove the floor trim for a complete professional finish.
Application Process
- First Coat: Apply using a high-quality synthetic brush or foam applicator, working in the direction of the wood grain. Maintain thin, even coats to avoid bubbles and drip marks.
- Drying Time: Allow the first coat to dry according to manufacturer specifications, typically 4-6 hours.
- Light Sanding: Lightly sand between coats with 220-grit sandpaper to ensure proper adhesion of subsequent coats. Remove all dust with a tack cloth.
- Additional Coats: Apply 2-3 total coats for optimal protection, following the same process of light sanding between each coat.
Quality Control
Inspect each dried coat under good lighting to identify any missed areas, bubbles, or imperfections. Address these issues before applying the next coat to ensure a flawless final finish.
DIY Project vs. Professional Floor Restoration
DIY Approach
Advantages of DIY Whitewashing:
Cost-effectiveness represents the primary advantage of the DIY route. Material costs for a typical room range from $100-300, compared to professional installation costs that can exceed $1,000 for the same space. The satisfaction of completing a major home improvement project yourself adds immeasurable value beyond monetary savings.
DIY projects also allow complete control over timing and process. You can work at your own pace, take breaks when needed, and make adjustments to achieve your exact vision for the final result.
Challenges to Consider:
The physical demands of floor refinishing cannot be overstated. Sanding is labor-intensive work that requires stamina and proper technique. The learning curve for achieving professional-looking results means your first attempt might not meet your expectations.
Time investment is substantial - a typical room requires 3-5 days from start to finish, including drying time between coats. Mistakes in sanding or stain application can be costly and time-consuming to correct.
Hiring a Professional
Professional Advantages:
Experienced contractors bring specialized knowledge and equipment that ensures consistent, high-quality results. They understand wood species characteristics, proper product selection, and application techniques that minimize common problems like lap marks, uneven stain absorption, and finish defects.
Professional installation typically includes warranties on both materials and workmanship, providing peace of mind and protection against potential issues.
Cost Considerations:
Professional whitewashing services typically cost $3-8 per square foot, depending on room size, wood condition, and local market rates. While more expensive upfront, professional installation can add significant value to your home and eliminate the risk of costly mistakes.
Making the Right Choice
Consider your experience level, available time, physical capabilities, and budget when deciding between DIY and professional installation. If you enjoy hands-on projects and have previous refinishing experience, DIY can be rewarding and cost-effective. However, for valuable or complex floors, or if you lack confidence in your abilities, professional installation ensures optimal results.
How to Clean and Maintain Your Whitewashed Wood
Daily and Weekly Maintenance
Routine Cleaning Schedule:
| Frequency | Task | Method |
|---|---|---|
| Daily | Remove surface debris | Sweep or dust mop |
| Weekly | Deep clean | Vacuum with soft brush attachment |
| Monthly | Thorough cleaning | Damp mop with pH-neutral cleaner |
| Annually | Professional assessment | Inspect for wear and refinishing needs |
Proper Sweeping and Vacuuming Techniques
Use soft-bristled brooms or microfiber dust mops for daily debris removal. When vacuuming, always use the soft brush attachment to prevent scratching the finish. Avoid beater bar attachments, which can damage the protective coating over time.
Dealing with Spills and Stains
Immediate response to spills prevents permanent staining and water damage. Blot spills immediately with clean, absorbent cloths, working from the outside of the spill toward the center to prevent spreading. Avoid letting any liquid sit on the surface, as even water can cause damage if allowed to penetrate the finish.
For sticky residues, use a slightly damp cloth followed immediately by thorough drying. Never use excessive water or allow moisture to pool on the surface.
Deep Cleaning Protocol
Monthly deep cleaning maintains the appearance and longevity of your whitewashed floors. Use only pH-neutral cleaners specifically designed for hardwood floors. Avoid household cleaners, vinegar, or oil-based products that can damage the finish or leave residues.
Deep Cleaning Process:
- Remove all loose debris through sweeping or vacuuming
- Mix cleaner according to manufacturer instructions
- Apply with a well-wrung mop, working in small sections
- Rinse mop frequently to avoid redistributing dirt
- Allow floor to air dry completely
Preventative Care Strategies
Furniture Protection: Install felt pads under all furniture legs and replace them regularly as they wear down. Use furniture sliders when moving heavy pieces to prevent scratching.
Area Rugs and Mats: Place high-quality mats at all entrances to trap dirt and moisture before it reaches your floors. Use area rugs in high-traffic zones to reduce wear on the finish.
Climate Control: Maintain consistent indoor humidity levels between 30-50% to prevent wood expansion and contraction that can stress the finish.
Chemical Avoidance: Never use harsh chemicals, bleach, ammonia, or wax-based products on your whitewashed floors, as these can damage the protective coating or alter the color.


