If you've been putting off a flooring update because you assumed it would cost a fortune, here's a number that might change your mind: basic laminate materials cost between $1 and $4 per square foot, compared to $8 to $15 per square foot for solid hardwood. That's not a rounding error. That's a genuinely different ballpark. This budget-friendly install guide is going to walk you through every step with care, from picking the right flooring layout, to outlined the process to learn how to nail that last row, so you get a floor that looks sharp and stays within budget.
Key Takeaways
| Question | Answer |
|---|---|
| How cheap can laminate flooring get? | Quality laminate starts around $1 per square foot. You can floor a whole room for what one hardwood plank costs. Browse our laminate flooring options here. |
| Do I need special tools to install laminate? | Not really. A pull bar, tapping block, spacers, and a miter saw handle about 95% of the job. Most of it you probably already own. |
| Is cheap laminate flooring durable enough? | Yes, if you pick the right AC rating. AC3 and AC4 rated laminate handles "life happens" households without a problem. |
| What thickness laminate should I buy on a budget? | 8mm is the sweet spot for budget installs. It clicks easily, sounds solid underfoot, and won't flex weirdly over minor subfloor imperfections. |
| What's the biggest mistake beginners make? | Skipping subfloor prep. A lumpy subfloor will ruin even the best laminate. Level it first, every single time. |
| Is it worth installing laminate myself instead of hiring someone? | Hands down, yes. Labor costs for professional installation often double your total project cost. Laminate is specifically designed to be a DIY-friendly floating floor. |
| Where can I find the best budget laminate in 2026? | Check out our guide to the best budget laminate floors for homes for real product recommendations with no fluff. |
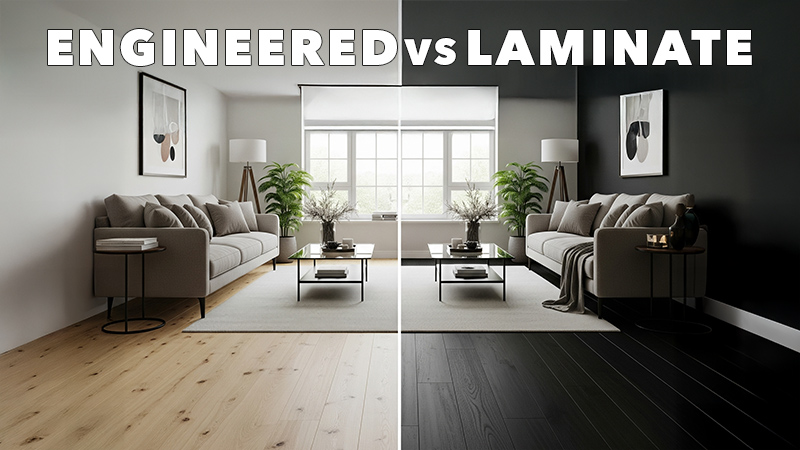
Why Laminate Flooring Is the Best Bang for Your Budget in 2026
Let's be honest about something. The flooring industry has a habit of making you feel like you have to spend big to get something decent. That's just not true with laminate flooring.
Laminate is a layered product, meaning you get a high-definition photographic layer (the wood or stone look) bonded to a core board, all protected by a wear layer on top. The wear layer is the magic part. It's what separates a floor that lasts 20 years from one that looks rough in five.
The secret to saving money on flooring is to educate yourself about what you're actually buying. When you understand the layers, you stop paying for marketing and start paying for performance.
In 2026, laminate has gotten genuinely impressive. The texture replication, easy fit laminate installation systems, the embossing, the plank widths, and the simple floor underlay needs. You can get a floor that a casual guest would swear is real hardwood flooring, for a fraction of the price. That's not a sales pitch. That's just where the design technology is.
How to Pick the Right Cheap Laminate Flooring Before You Buy
Not all cheap laminate flooring is created equal. There are a few numbers you need to know before you pull out your credit card.
AC Rating. This tells you how durable the wear layer is. Here's the quick and dirty version:
- AC1/AC2: Light residential. Fine for a bedroom nobody really uses.
- AC3: Standard residential. Handles a normal family, pets included.
- AC4: Heavy residential or light commercial. If your house is a "life happens" kind of home, this is your number.
- AC5: Full commercial. Probably overkill for your living room, but it exists.
Core material. This is where cheap laminate can really bite you. Standard MDF cores can absorb roughly 15 to 25% of their own weight in water after just 24 hours, with thickness swelling up to 8 to 10% in some cases. If you're installing in a kitchen, bathroom, or any space with moisture, look specifically for a waterproof core or a water-resistant rating.
Thickness. For a budget install, 8mm hits the sweet spot. Thicker (10mm, 12mm) is nicer underfoot, but it costs more. Unless you're going over a seriously uneven subfloor, 8mm will do the job fine.
Want to skip the homework and just see what's available? Shop our laminate flooring selection here and filter by what actually matters.
The Tools You Need to Install Laminate Flooring (And What You Can Skip)
Here's the great thing about laminate. It's a floating floor, which means nothing gets glued or nailed to your subfloor. The planks click together and float as one connected system. That simplicity is why this is hands down one of the best DIY flooring projects you can tackle.
You need these tools. No substitutions:
- Tape measure (obviously)
- Miter saw or circular saw for cutting planks to length
- Jigsaw for cutting around door frames, toilets, and weird obstacles
- Tapping block to protect the locking edge when snapping planks together
- Pull bar for getting that last row tight against the wall
- Spacers to maintain your expansion gap (more on that below)
- Pencil and chalk line for keeping rows straight
Tools you do NOT need to rent or buy:
- A nail gun
- A flooring stapler
- Any adhesive (for floating install)
See? This budget-friendly laminate flooring install guide isn't asking you to get fancy.

Subfloor Prep for a Floating Floor Install + The Step Everyone Skips
I'll be straight with you. This is the step that separates a floor that lasts 20 years from one that creaks, pops, and looks terrible by year three.
Your subfloor needs to be:
- Clean: Sweep or vacuum thoroughly. Any debris under the laminate will create a pressure point and eventually cause clicking or cracking sounds.
- Dry: Use a moisture meter. Anything over 12% moisture content in a wood subfloor means you have a moisture problem to address before you install anything.
- Flat: The standard is no more than 3/16 inch variation over a 10-foot span. Use a long straightedge to check. Fill low spots with floor leveling compound. Sand down high spots.
Skipping subfloor prep to save time is a false economy. You'll spend more time later pulling up a floor that failed than you would have spent just doing it right to begin with.
A clear, step-by-step guide to installing laminate flooring on a budget. Follow these five steps to save time and achieve a professional finish.
Laminate Floors Install Guide: Step by Step

Alright. Subfloor is clean, flat, and dry. You've got your tools. Let's do this.
Step 1: Acclimate Your Laminate
Pull the boxes out of the garage and bring them into the room where you're installing. Let them sit there for at least 48 hours. Laminate needs to adjust to the room's temperature and humidity before you install it, or the planks will expand and contract after installation and create gaps or buckling.
This step costs you nothing but time. Do not skip it.
Step 2: Install the Underlayment
Most cheap laminate flooring doesn't come with underlayment pre-attached. You need a separate underlayment layer. It does three things: provides a small amount of cushion underfoot, helps with sound dampening, and acts as a moisture barrier.
Roll it out across your entire subfloor, butting the edges together (not overlapping). Tape the seams with the appropriate underlayment tape. If you're over concrete, use an underlayment with a built-in vapor barrier.
Step 3: Plan Your Flooring Layout
Where you start matters. Most installers start along the longest, straightest wall in the room. Snap a chalk line parallel to that wall to keep your first row perfectly straight.
Here's a planning tip most budget guides leave out: measure the width of your room and figure out how wide your last row will be. If it's less than half a plank width, rip your first row down so your last row is wider. A skinny sliver of laminate against a far wall looks amateur.
Step 4: Lay Your First Row before Cutting Laminate Boards
Place spacers (typically 1/4 inch) along every wall. This is your expansion gap. Laminate expands and contracts with temperature changes, and without this gap, it will buckle and push up against the wall.
Start in the corner, groove side facing the wall, and work left to right. Click the short ends together by angling one plank into the previous one and pressing down. Most modern laminate uses an angle-angle or angle-tap locking system. The clicks should feel solid, not forced.
Step 5: Stagger Your Joints
This is non-negotiable for structural integrity and appearance. Each row's end joints should be offset from the previous row by at least 12 inches (and ideally one-third of the plank length). Never let end joints line up in adjacent rows. It's called "H-joint" and it looks bad and weakens the floor.
Use the offcut from the previous row to start the next row. This reduces waste and automatically gives you that stagger.
Step 6: Work Across the Room
Continue row by row. Tap planks together with your tapping block. Use your pull bar to snug up planks in tight spots near walls. Keep checking that your rows stay straight by referencing your chalk line occasionally.
Cut around door frames by undercutting the casing with a jamb saw. Slide the laminate underneath instead of cutting a notch around it. It looks cleaner and takes about two minutes.
Step 7: Cutting Planks to Install the Last Row and Trim
The last row almost always needs to be ripped (cut lengthwise) to fit. Measure the gap, subtract your 1/4 inch expansion space, and rip the planks to width with your table saw or circular saw.
Once the floor is down, remove all spacers. Install baseboards or quarter round molding to cover the expansion gap. Nail the molding to the wall, not the floor. The floor needs to float freely underneath.

High-Traffic Area Features to Focus On
Not all rooms are created equal. A bedroom is a very different animal from a kitchen or a hallway that every person in the house crosses 30 times a day.
For high-traffic zones, here's what actually matters in your budget laminate flooring selection:
- Minimum AC3 wear layer. Don't cheap out on this one thing. The wear layer is your floor's armor.
- Textured surface finish. A matte or embossed finish hides scratches and dust. Living on a mirror isn't practical, and in 2026, it isn't stylish either. Skip the high-gloss options in high-traffic areas.
- Thicker core. In a hallway or kitchen, bump up to 10mm if you can stretch the budget. It feels more solid and handles repeated impact better.
- Water resistance. Kitchens and mudrooms need it. Even if you're not near standing water, spills happen. A water-resistant core gives you time to clean up before damage sets in.
The shiny finish doesn't hold up in a "life happens" type of home. We've been saying that for years and we stand by it every single time.
Common Mistakes That Will Cost You Money
Want to know the fastest ways to turn a cheap flooring project into an expensive disaster? Here they are. Don't say we didn't warn you.
Not buying enough material. Always add 10% overage to your square footage calculation. Add 15% if you have a lot of angled cuts or a room with lots of obstacles. Running short mid-project means potentially ordering a new batch that doesn't match your original dye lot.
Ignoring the expansion gap. We said it before, we'll say it again. Without that 1/4 inch gap around every wall, your floor will buckle when temperatures change. It happens every time. Leave the gap.
Installing over moisture. Laminate and moisture are not friends. Test your subfloor. Check the room humidity. If you're in a basement, make absolutely sure your vapor barrier is correct. This is the number one cause of laminate failure, and it voids most manufacturer warranties.
Using the wrong underlayment. If your laminate already has underlayment attached (many do), adding a second layer underneath causes the locking system to flex too much and fail. Read the product specs before you add anything underneath.
Rushing through cuts. A bad cut wastes a plank. At $1 to $4 per square foot, wasted planks add up. Measure twice. Cut once. It's a cliché because it's true.
Is Cheap Laminate Actually Worth It in 2026?
Short answer: yes, with a caveat.
Cheap laminate flooring is absolutely worth it if you buy smart. The keyword is "educate yourself." When you know what AC rating means, when you understand what a core is made of, when you know to check for a moisture barrier, you can absolutely find a cheap laminate floor that performs like a product costing twice as much.
What cheap laminate is not is a product to buy based purely on price per square foot without reading a single spec. A 6mm, AC1, paper-thin wear layer floor at $0.79 per square foot is going to disappoint you in year two. That's not laminate flooring's fault. That's a buying decision fault.
The good news? At Really Cheap Floors, we have the best value on flooring in America. Hands down. We're not going to try to sell you something that's going to fall apart. Our whole thing, for the past 50 years, has been giving real homeowners real product at prices that make sense.
Want the specific product recommendations, not just the install process? Our best budget laminate floors for homes guide covers exactly that, with real options and no fluff.
Laminate vs. Other Cheap Flooring Options: How Does It Stack Up?
You might be asking yourself: why laminate specifically? What about cheap vinyl, or engineered hardwood on sale?
Fair question. Here's the honest comparison:
| Flooring Type | Typical Budget Cost (per sq ft) | DIY Friendly? | Water Resistant? | Looks Like Wood? |
|---|---|---|---|---|
| Laminate Flooring | $1 to $4 | Yes (floating) | Varies by product | Very convincingly |
| Luxury Vinyl Plank | $2 to $5 | Yes (floating) | Yes (100%) | Yes |
| Engineered Hardwood | $3 to $8 | Yes (floating or staple) | Moderate | Yes, it is real wood |
| Solid Hardwood | $8 to $15+ | Harder (nail-down) | No | Yes, it is real wood |
For a purely budget-focused project, laminate wins on price per square foot, every time. If moisture is a serious concern (think basement or bathroom), luxury vinyl plank is worth the small extra spend. But for main living areas, bedrooms, and dining rooms, a solid AC3 or AC4 laminate flooring product is going to do the job beautifully for years.
Maintaining Your Laminate Floor After the Install
Good news here. Laminate is one of the lowest maintenance floors you can put down. There's no refinishing, no re-oiling, no waxing. It is genuinely no-nonsense.
Here's the routine:
- Daily/Weekly: Dry microfiber mop or vacuum on the hard floor setting (no beater bar). Grab the dirt before it grinds into the surface.
- Monthly/As needed: Damp mop with a laminate-specific cleaner. Never use a soaking wet mop. Never use steam. Moisture is still the enemy.
- Protect the floor: Felt pads under furniture legs. Entry mats at outside doors. Area rugs in high-traffic zones.
That's genuinely it. A quality laminate floor installed correctly, maintained simply, can last 15 to 25 years. That's a pretty good return on a $1 to $4 per square foot investment.
The Concrete Care Conclusion
This budget-friendly laminate flooring install guide covers everything from picking the right product to laying the last row. None of it requires a contractor, a big budget, or years of experience. It requires patience, the right tools, and the knowledge to make smart product decisions before you buy.
Buy the right AC rating. Prep your subfloor properly. Acclimate your planks. Leave your expansion gaps. Stagger your joints. That's really the whole game with laminate flooring installation.
The cheap part is the price. The quality is up to you to select. Do it right and you'll have a floor you're genuinely proud of, for a fraction of what it would have cost you otherwise. We have the best value on flooring in America. Hands down. And we want to help you stay under budget without sacrificing results.
Shop our full laminate flooring selection and see what's in stock right now.
Frequently Asked Questions
How much does it cost to lay laminate flooring yourself in 2026?
If you DIY the install, your main cost is the laminate flooring itself, which typically runs $1 to $4 per square foot for budget options, plus underlayment at roughly $0.25 to $0.50 per square foot. Add in tools if you don't own them, and you're still looking at a fraction of what professional installation costs. A 200 square foot room can realistically be done for $300 to $700 total on a budget.
Is cheap laminate worth buying, or will I regret it?
Cheap laminate flooring is worth it when you buy based on specs, not just price. Check the AC rating (go AC3 minimum), confirm the core material, and verify the thickness is at least 8mm. A cheap laminate flooring product bought with those specs in mind will hold up for years in a regular family home.
Can I install laminate over tile or existing flooring?
Yes, in many cases you can install laminate over existing flooring, including ceramic tile, as long as the surface is flat, firmly adhered, and no more than 3/16 inch variation over 10 feet. Be aware that adding height can affect door clearance and transitions. Check that specification before you commit.
What is the hardest part of a DIY laminate install?
Honestly, the trickiest parts are cutting around irregular obstacles like door casings, hearths, and plumbing fixtures. The actual laying of straight runs is straightforward. A jigsaw and patience solve most of these challenges. The other tricky part is the last row, which almost always needs to be ripped to width and snapped in with a pull bar rather than the standard click method.
How long does it take to install laminate in an average room?
For a 200 to 300 square foot room with no major obstacles, a first-time DIYer should budget a full day including subfloor prep and cleanup. An experienced installer can move much faster. Factor in the 48-hour acclimation period before you even start, so plan the project over a long weekend.
What's the difference between laminate and luxury vinyl plank for a budget install?
Both are budget-friendly floating floor options that click together similarly. The main difference is that luxury vinyl plank is fully waterproof (100% plastic core) while laminate flooring is water-resistant at best. If you're installing in a basement, bathroom, or kitchen where standing water is a real risk, LVP is the smarter budget choice. For dry areas like bedrooms and living rooms, laminate flooring often gives you a better visual result at a lower price point.
Do I need to remove baseboards before installing the floor underlay for laminate?
You don't have to, but it's easier if you do. Removing baseboards lets you slide the laminate flooring right up to the wall and reinstall the baseboards to cover the expansion gap cleanly. If you leave baseboards in place, you need quarter round or shoe molding to cover the gap, which adds a visible line at the floor edge. Both approaches work, but removing baseboards gives you a cleaner finish with no extra trim.