
If you're ready to tackle how to remove laminate flooring yourself, here's something that should get you fired up: DIY flooring removal can save homeowners between 40% and 60% of total project costs, often translating to $3,000–$6,000 in labor savings on a standard living room. That's real money you can put toward quality replacement flooring instead of handing it to a crew. We've helped tens of thousands of families work through flooring projects just like this, and we're here to walk you through every step so you don't make the common mistakes that cost people time and planks.
Key Takeaways
| Question | Answer |
|---|---|
| Can I remove laminate flooring myself? | Yes. Laminate is a floating floor in most cases, meaning it isn't glued or nailed to the subfloor. A basic toolkit and a free Saturday is usually all you need. |
| What tools do I need to remove laminate flooring? | A pry bar, pull bar, tapping block, utility knife, hammer, and a shop vac for cleanup. Glue-down installs may also need a floor scraper. |
| How long does it take to remove laminate flooring? | Plan for 5–7 hours for an average living room. Larger rooms, glued installs, or multiple layers add time. |
| Can removed laminate flooring be reused? | Sometimes, if planks were in a floating click-lock install and came up undamaged. Glued planks almost never survive removal intact. |
| What flooring can I install after removing laminate? | Virtually anything: luxury vinyl plank, engineered hardwood, solid hardwood, or new laminate. Your subfloor condition will drive that decision. |
| Is laminate flooring waterproof? | No. Laminate is water-resistant at best, not waterproof. Moisture damage is one of the top reasons homeowners remove it early. |
| Do I need to remove baseboards first? | Yes. Quarter-round and baseboards cover the expansion gap. Removing them first protects the walls and gives you clean access to the perimeter planks. |
What Is Laminate Flooring and Why Do Homeowners Remove It?
Before we get into the how, let's make sure we're on the same page about what we're dealing with. Laminate flooring is a multi-layer synthetic product that mimics the look of wood or stone. It's built with a fiberboard core, a photographic image layer, and a protective wear layer on top.
It's been a popular cheap flooring option for decades. And it's not bad flooring. But there are a handful of very common reasons people end up removing it.
- Moisture damage. Laminate and water are not friends. Swollen, buckled, or discolored planks near kitchens, bathrooms, or exterior doors are a dead giveaway.
- Outdated style. Gray-toned laminate, for example, is cited as one of the top disappearing trends in 2026. A lot of homeowners installed it five years ago and now want something warmer.
- Worn wear layer. High-traffic areas can wear through the surface image layer, leaving the floor looking scratched and dull with no good repair path.
- Upgrading to hardwood or vinyl plank flooring. Many homeowners start with laminate and later upgrade to solid or engineered hardwood, or switch to a waterproof vinyl plank option that performs better long-term.
Whatever your reason, the process for how to remove laminate flooring is largely the same regardless of why you're pulling it up.
Tools You Need Before You Start Removing Laminate Flooring
Don't underestimate the prep stage. Showing up without the right tools is how a five-hour job turns into a two-day mess.
Here's what you'll want on hand:
- Pry bar (flat bar) for popping up perimeter planks and lifting baseboards
- Hammer for tapping the pry bar and working planks free
- Pull bar for click-lock joints at walls
- Utility knife to score any caulk, adhesive seams, or transition strips
- Floor scraper if you're dealing with a glue-down install
- Shop vac and heavy-duty trash bags for cleanup (this part matters more than people think)
- Safety glasses and knee pads because you'll be on the floor for hours and debris flies
- Work gloves because cut laminate edges are genuinely sharp
Most of these tools you likely already own or can grab cheaply at any hardware store. You're not looking at a big equipment investment here.
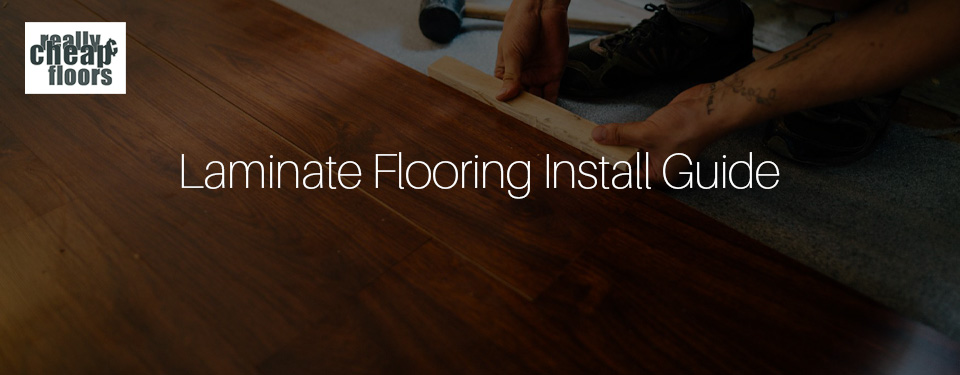
A simple 5-step guide to safely removing laminate flooring. Learn the tools, preparation, scoring, lifting, and cleanup tips.
Step-by-Step: How to Remove Laminate (Floating/Click-Lock Install)
The vast majority of laminate flooring out there is a floating click-lock install. That means the planks interlock with each other but are not attached to the subfloor. Good news: this is the easiest type to remove laminate flooring from.
Step 1: Clear the Room Completely
Move every piece of furniture out. Every single piece. Working around a sofa or bed is how planks get damaged and how people get hurt.
Shut off any HVAC registers in the floor if you have them. You don't want debris falling into the system.
Step 2: Remove Quarter-round and Baseboards with a Pry Bar
Use a utility knife to score any painted caulk lines at the base of your trim. Then use a flat pry bar to gently work the quarter-round or baseboards away from the wall.
Go slow here. Rushing this step is how you put holes in drywall. Mark each piece with painter's tape and a number so you can reinstall them in the same spots.
Step 3: Find and Remove Your Starting Plank
You want to start at the edge of the room that gives you the most room to work. Look for an end joint along the wall. Use your pry bar to pop up the first plank. With click-lock flooring, this usually means angling the plank upward at about 45 degrees and pulling toward you.
It'll feel stiff the first few planks. That's normal. Once you have two or three rows up, the rest moves much faster.
Step 4: Work Row by Row to complete the Floor Removal
Here's the part most DIYers get wrong. They try to pull planks up straight off the floor. Don't do that. You'll crack them.
Instead, lift the plank at an angle to disengage the long side click joint, then slide it laterally to release the short end joint. Work systematically, row by row, stacking planks as you go.
Stack them neatly against a wall as you clear space. Chaotic piles lead to broken planks and tripping hazards.
Step 5: Roll Up the Underlayment
Once the planks are up, you'll find the foam or cork underlayment beneath. Roll it up from one end of the room to the other. Most underlayment can be bundled and bagged for trash disposal or recycling.
Inspect the subfloor underneath for any moisture staining, soft spots, or adhesive residue before you move forward.
How to Remove Glued-Down Laminate Flooring (The Harder Version)
Older laminate installs, especially those done before click-lock systems became standard, were often glued directly to the subfloor. This is a different animal entirely.
Here's the honest truth: glued-down laminate removal is more work, more mess, and more time. Plan for it.
Scoring and Breaking
Start by scoring across the planks with a utility knife every 12–18 inches. You're creating manageable sections rather than trying to rip up full-length planks.
Use a floor scraper or a long-handled ice scraper to get under each section. Work at a low angle to the floor to minimize gouging the subfloor underneath.
Dealing With Adhesive Residue
The glue left behind is the most time-consuming part. You have a few options: a commercial adhesive remover (follow the manufacturer guidelines strictly), a heat gun to soften stubborn spots, or careful mechanical scraping.
Don't rush the adhesive removal. Whatever flooring goes down next needs a flat, clean subfloor. This step directly affects how your new floor performs and lasts.
Watch the Subfloor
Glued installs put you at greater risk of damaging the subfloor underneath during removal. Plywood subfloors are especially vulnerable to surface tearing. Work carefully, especially near seams.
If you find significant subfloor damage, get that addressed before you install anything new. Skipping that step is how problems get buried and resurface six months later.
How to Remove Transition Laminate Around Cabinets, Stairs, and Awkward Spots
Open floor spaces are easy. It's the edges, corners, and built-in obstacles where most DIYers slow down. Here's how to handle the tricky areas.
Around Kitchen Cabinets
Laminate installed before cabinets were placed runs underneath them. You can't (and shouldn't try to) remove those sections. Score the laminate flush against the cabinet toe-kick with a utility knife and leave those planks in place.
Whatever new flooring you install will butt up against that existing edge. A transition strip or some careful trimming handles the visual seam.
Around Door Frames
Most laminate installers undercut door casings and slid planks underneath for a cleaner look. Use a pull bar and hammer to work those planks back out from the undercut area. Take it slow. Forcing them cracks both the plank and sometimes the casing.
On Stairs
Stair laminate is almost always glued or stapled. Score each tread and riser section individually with a utility knife and use a pry bar to work from the nose of each tread back. Expect more stubborn resistance than a flat floor. A heat gun can help soften adhesive on tread sections significantly.
Preparing the Subfloor After You Remove Laminate Flooring
Here's the part where we need to address the elephant in the room. A lot of homeowners rip up their old laminate and go straight to installing the new stuff. That is a mistake. Every single time.
Your subfloor needs attention before anything new goes down.
- Check for moisture. Use a moisture meter or tape plastic sheeting to the subfloor for 24 hours. If moisture is present, identify and fix the source first. This is non-negotiable.
- Check for flatness. Use a long straightedge across the floor. High spots over 3/16" per 10 feet need to be sanded down. Low spots need leveling compound.
- Remove all adhesive, staples, and debris. Even small raised staples or dried adhesive bumps will telegraph through new flooring.
- Inspect for soft spots or rot. These need to be repaired or the affected section replaced entirely.
Subfloor prep is honestly the most important step in the whole process. Skipping it or rushing it is exactly how you end up pulling up your brand new floor two years later.
What to Install After You Remove Laminate Flooring: Your Best Options in 2026
You've done the hard work. Now comes the fun part. Here's what we see homeowners choosing most in 2026 once the old laminate is out.
Luxury Vinyl Plank Flooring
Vinyl plank flooring is, honestly, the most popular replacement choice right now, and for good reason. It's 100% waterproof, durable, and available at discount prices that make the budget math easy. Our first quality LVP starts at prices lower than what most people pay for cheap, low-quality stuff at big box stores. You have no excuses to go the low-end route when quality is this affordable.
Check out our full luxury vinyl plank flooring selection to see what's available right now in our inventory.
Curious how it compares to laminate? We put together a detailed breakdown in our laminate vs. LVP guide that walks through every meaningful difference.
Engineered Hardwood Flooring
If you want real wood underfoot and the warm, timeless look that never goes out of style, engineered hardwood is the move. It handles moisture better than solid hardwood and installs over a wider range of subfloor conditions, including concrete slabs. The look you get is identical to solid hardwood from above. The difference between engineered hardwood and laminate is significant in terms of feel, resale value, and long-term performance.
Because we've built our entire business model around cutting out unnecessary middlemen and markups, we can offer engineered hardwood at prices that should make you do a double-take. That designer "natural honey" or "sandstone blonde" look you've been eyeing? We can get you there for 40-60% less than traditional retailers.
New Laminate Flooring
Sometimes removing the old laminate and installing fresh, higher-quality laminate is the right call. Technology in laminate manufacturing has improved dramatically. Today's laminate has thicker wear layers, more realistic visuals, and better moisture resistance than what was being installed ten years ago.
Browse our laminate flooring clearance and sale selection to see what we have in stock right now.
Common Mistakes to Avoid When You Remove Laminate Flooring
We've seen every mistake in the book. Here are the ones that cost people the most time and money.
| Mistake | Why It's a Problem | What to Do Instead |
|---|---|---|
| Skipping baseboard removal | Tears drywall and blocks perimeter plank access | Always remove trim first, label each piece |
| Pulling planks straight up | Cracks planks and damages click joints | Angle at 45 degrees, disengage joints laterally |
| Ignoring the subfloor | New flooring fails quickly over a compromised base | Moisture check, level, clean before installing anything new |
| Rushing glue-down removal | Gouges and tears the subfloor underneath | Score sections first, use a low scraper angle |
| Not protecting adjacent rooms | Dust and debris spread through the whole house | Hang plastic sheeting over doorways before you start |
Can You Reuse Laminate Flooring After Removal?
Here's a question we hear a lot. The honest answer is: maybe, but don't count on it.
Click-lock planks that came up cleanly, without cracked edges or damaged joints, can theoretically be reinstalled. But the reality is that laminate click joints are engineered for a single installation. They loosen slightly each time they're disassembled. The result is a floor that feels less solid and has more visible gaps.
If you're removing laminate because it's old, worn, or moisture-damaged, there's no scenario where reinstalling it makes sense. You're much better off picking up quality new flooring at a discount and starting fresh.
Where does laminate actually fit in the flooring landscape? Our guide on what laminate flooring is and how it's built gives you the full picture if you want to understand the product before you decide what comes next.
Disposal: What to Do With Old Laminate Flooring
Once it's up, you've got a pile of old laminate to deal with. Here are your options.
- Curbside or dumpster. Most laminate goes to the landfill. Bag it in heavy-duty contractor bags. Check your local waste guidelines on bulk pickup rules.
- Habitat for Humanity ReStores. If your planks are in genuinely good condition (clean floating install, no water damage), some ReStore locations will accept laminate donations.
- Recycling programs. Some manufacturers and flooring retailers have take-back programs in 2026. It's worth a quick call before sending everything to the dump.
- Online marketplace or Craigslist. Undamaged floating laminate occasionally sells on local marketplaces for a few cents per square foot. It won't make you rich, but it keeps it out of the landfill.
The underlayment foam can often be recycled separately. Check with your local recycling center about foam pad acceptance.
You Know How to Remove Laminate Flooring Now
Knowing how to remove laminate flooring correctly means the difference between a clean weekend project and a subfloor repair nightmare you didn't budget for. Take it room by room, use the right tools, don't skip the subfloor prep, and you'll be set up perfectly for whatever new flooring you choose next.
Really Cheap Floors isn't a faceless corporation. We're a family business that's been serving homeowners since the 1970s, and we understand flooring anxiety because we've helped tens of thousands of families work through it. Whether you're upgrading to hardwood flooring, switching to waterproof vinyl plank flooring, or looking for the best discount on new laminate, our liquidation business model means you can get quality product without the markup.
Browse everything we have in stock, ask us questions, and let's get your floors looking exactly the way they should. Cheap flooring is our middle name, but cheap and low-quality are not the same thing. We'll make sure you know the difference.
Frequently Asked Questions
How long does it take to remove laminate flooring from a 12x12 room?
A 144 square foot room typically takes 2–3 hours for a click-lock floating install if you're working alone. Add time for baseboard removal, underlayment disposal, and subfloor prep. Glue-down laminate in the same space could easily double that estimate.
Can I install new vinyl plank flooring directly over old laminate without removing it?
Sometimes you can install vinyl plank flooring over existing laminate if the laminate is flat, firmly attached, and shows no moisture damage or soft spots. However, removing the old flooring first is almost always the right call. It gives you a proper subfloor assessment and eliminates the risk of compounding problems underneath.
Is it worth paying someone to remove laminate flooring or should I DIY it?
For most homeowners with a basic tool kit, DIY removal is the clear winner on cost. Labor for professional flooring removal typically runs $1–$2 per square foot, which adds up fast. The DIY process for a floating click-lock install is genuinely manageable for anyone willing to spend a Saturday on it.
How do I remove laminate flooring without damaging the subfloor underneath?
For floating installs, use a pry bar at a low angle along the perimeter and work planks out at 45-degree angles rather than pulling straight up. For glue-down laminate, score planks into sections first and use a floor scraper held nearly flat to the surface to minimize gouging.
What is the difference between removing laminate flooring vs. removing vinyl plank flooring?
The removal process is similar for both click-lock floating products. The main differences are weight (vinyl plank flooring is heavier per plank) and adhesive behavior if glued (vinyl tends to hold differently than laminate adhesive). Both respond well to the same basic pry-bar and angle technique for floating installs.
Does removing laminate flooring expose asbestos in older homes?
If your home was built before 1980, there's a real possibility that older adhesive or vinyl underlayment beneath the laminate contains asbestos. Don't disturb it without testing first. Hire a certified inspector to test any suspicious materials before you begin removal on older installs.
What is the best cheap flooring option to install after removing laminate in 2026?
In 2026, luxury vinyl plank flooring offers the best combination of price, durability, and waterproof performance for most homeowners replacing laminate. It installs easily over a prepared subfloor, looks great, and holds up better in moisture-prone areas than the laminate you're replacing. Engineered hardwood is the top choice if you want real wood and have the budget for a slight step up.