Did you know that engineered wood now holds a 71.98% share of the hardwood flooring market, largely because so many homeowners need to install over concrete subfloors? If you are sitting in a house with a slab foundation wondering whether you can get real wood floors, the answer is yes, and learning how to install, complete surface preparation, selecting flooring adhesives, and testing wood moisture is easier than you think.
For more than 50 years we have helped regular folks skip the headaches and get straight to a floor they love. Remember, cheap flooring is our middle name, and this guide is going to show you how to get killer value without the big-box markups while sweeping past any barriers that could stand in your way.
Key Takeaways
|
What You Need to Know |
The Straight Answer |
|---|---|
|
Can you install engineered hardwood over concrete? |
Yes. Engineered hardwood is specifically designed for concrete subfloors because its multilayered core handles moisture better than solid wood. |
|
What installation methods work over concrete? |
Glue-down and floating are the two primary methods. Both work, but glue-down offers a more solid feel while floating is faster for DIYers. |
|
How much money can I save doing it myself? |
With professional labor running $8.00 or more per square foot in 2026, a DIY install on a 500 sq ft room saves you thousands. |
|
What is the biggest mistake DIYers make? |
Skipping moisture testing. Concrete slabs trap moisture that will warp and buckle your floor if you do not test and prep properly. |
|
Where can I find affordable engineered hardwood? |
Our engineered hardwood collection starts as low as $1.29 per square foot for first quality, American-made products. |
|
Is vinyl plank a cheaper alternative over concrete? |
Vinyl plank is cheaper and fully waterproof, but it is not real wood. Engineered hardwood gives you genuine wood beauty and adds resale value. |
Why Engineered Hardwood Is Your Best Bet Over a Concrete Subfloor
Let me pull back the curtain on why engineered hardwood is the go-to choice for concrete installations. Solid wood planks react like crazy to moisture changes, and concrete is basically a giant sponge that pulls moisture up from the ground.
Large changes in moisture content can cause big problems for planks made with solid wood. Engineered hardwood flooring handles moisture changes better because its multilayered core combats cupping and warping.
Think of it this way. The top layer is real wood veneer, so you get the actual grain and color of oak, hickory, or whatever species you choose. Underneath that, you have multiple plies of plywood stacked with alternating grain directions.
That cross-directional construction is what keeps the floor stable when your concrete slab breathes moisture in and out with the seasons. It is the same principle behind plywood itself, and it works.
Now before you get all excited and call me a big fat liar because you know better, let me expound on this subject a little more. Engineered does not mean fake. The wear layer on a good engineered product is real sawn wood, sometimes up to 3mm or more, that you can sand and refinish down the road.
If you read many product reviews today you will find many problems arising from a floor moving or warping due to direct sunlight, or excessive temperatures or moisture. The multilayered core of engineered hardwood fights exactly that kind of movement, which is why it is the smart choice over concrete.
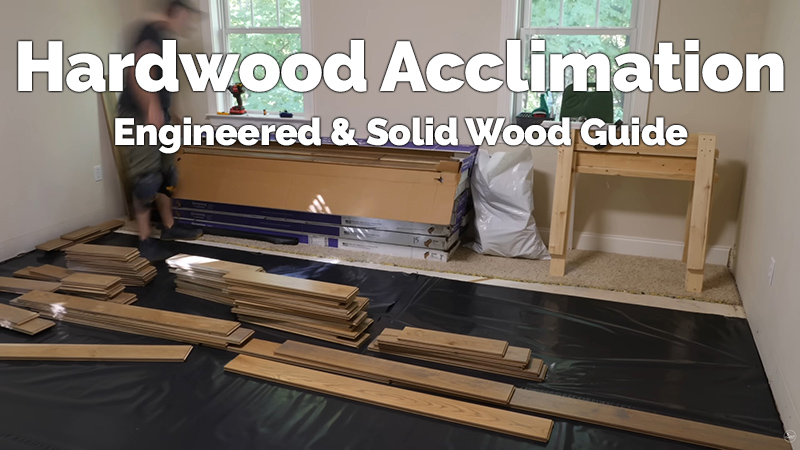
Prepping Before Installation
This is where a lot of DIYers get in trouble. They buy their cheap flooring, bring it home, and want to start ripping boxes open immediately. Do not do that.
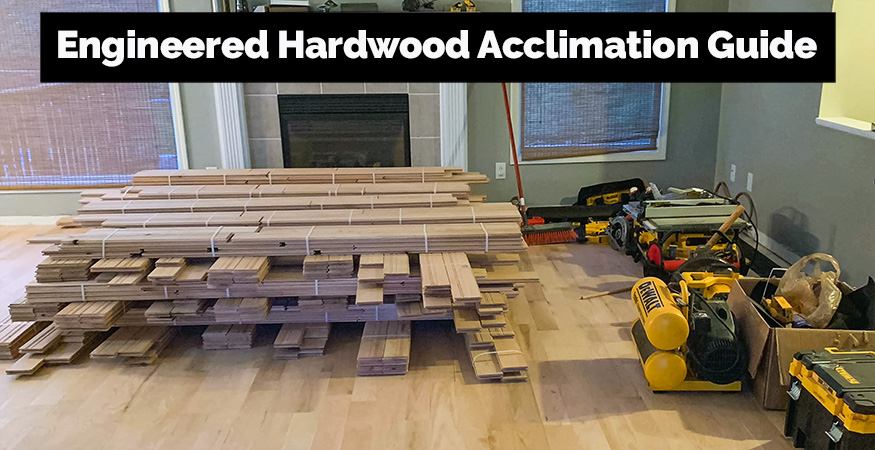
Your floor needs to acclimate. The wood has to sit in the room where it will be installed so it can adjust to the temperature and humidity of your home. Skipping this step is a mountain of work you do not want to deal with later.
Here is what you need to do before you even think about opening a box:
-
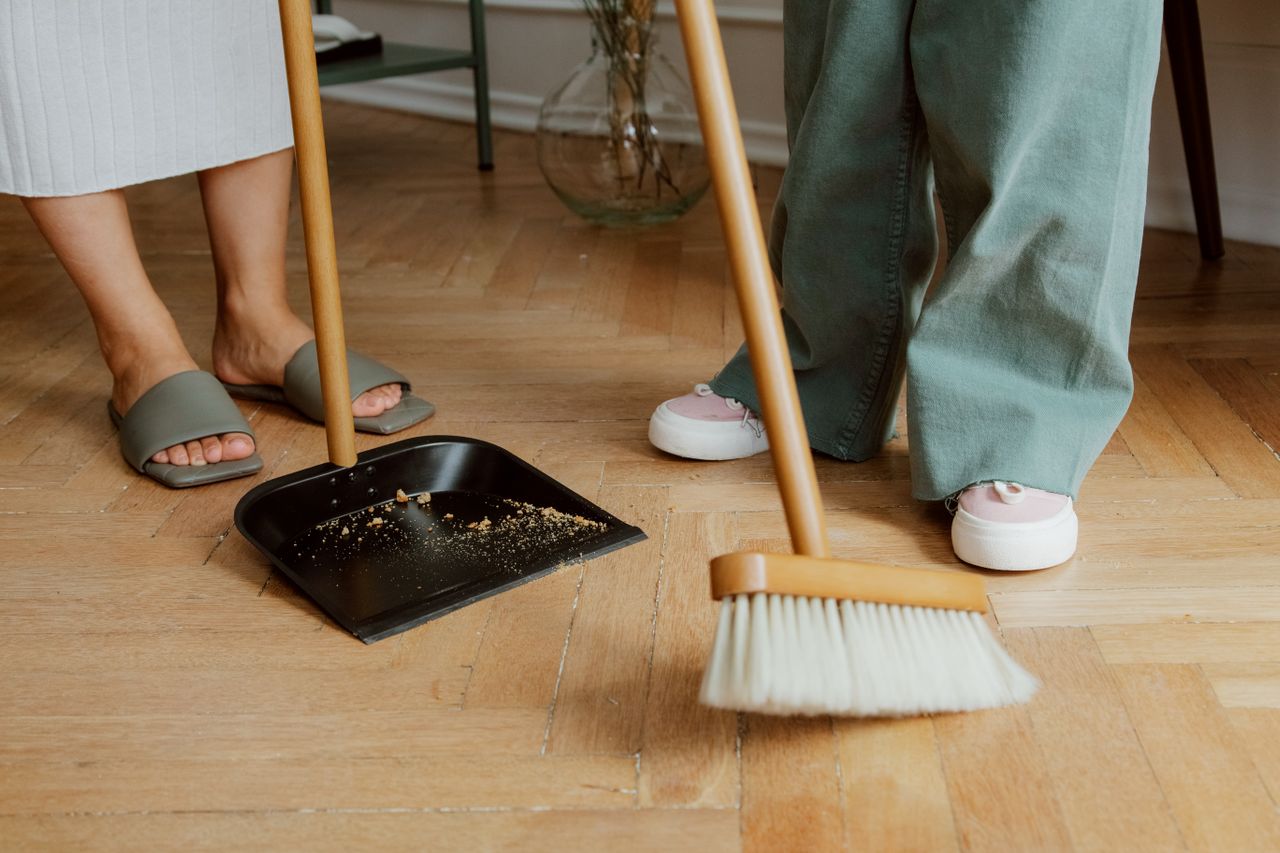
Clean the slab thoroughly. Sweep, vacuum, and scrape off any paint, drywall mud, or adhesive residue. The concrete needs to be bare and smooth.
-
Check for cracks and fill them. Small hairline cracks are fine, but anything wider than a quarter inch needs patching with a concrete crack filler.
-
Test for flatness. Lay a 10-foot straightedge across the floor in multiple directions. If you see gaps taller than 3/16 of an inch, you need to use a self-leveling compound to flatten those areas.
-
Run your HVAC for at least a week. The jobsite needs to be at normal living conditions (60-70 degrees F) with humidity between 35-55% for a minimum of seven days before flooring arrives.
That last bullet is not a suggestion. It is the difference between a floor that lasts 30 years and one that buckles in six months. I do not want to tell you how many times I bought something that was junk, trying to save a few pennies, before I became older and wiser. Rushing the prep is the same thing as buying junk.
Moisture Testing: The Critical Step
Concrete always has some moisture in it. Always. Even a slab that looks bone dry on the surface can be pushing moisture up from below. That is why testing is non-negotiable.
You have two main ways to test. The first is a calcium chloride test, which measures the moisture vapor emission rate. The second is a relative humidity probe test that goes into the slab itself.
For most DIYers, a simpler approach is using a concrete moisture meter. It will not give you the lab-level precision of a calcium chloride test, but it will tell you whether you have a serious problem that needs addressing before you install.
Did You Know?
Flooring must be stored in the conditioned installation area for a minimum of 72 hours to allow the wood to adjust to the room's temperature and humidity.
Source: reSAWN TIMBER co.
If your moisture readings are too high, you have options. You can install a vapor barrier membrane over the concrete before installing your floor. Or you can use a moisture-control adhesive that doubles as both glue and vapor barrier.
Either way, do not skip this step. Knowing the difference before you buy your materials can save you a weekend of frustration and a few hundred dollars in unexpected labor costs. Or in this case, it can save you a whole floor.
And remember that acclimation time. Your flooring boxes need to sit in the installation room, unopened, for that 72-hour minimum. The HVAC needs to be running at normal occupancy temperatures the whole time.
Two Methods: Only One is Recommended
There are three ways to install engineered hardwood, but when you are working over concrete, only two of them really apply. Let me walk you through all three so you know what your options are.
Method 1: Glue-Down Installation
This is the gold standard for installing engineered hardwood over concrete subfloors. You trowel adhesive directly onto the slab and press the planks into it. The glue acts as both a bonding agent and a moisture barrier if you use the right product.
Pros of glue-down:
-
Most solid feel underfoot with no hollow sounds
-
Excellent moisture protection when using a moisture-control adhesive
-
No underlayment needed, which saves money
Cons of glue-down:
-
More physical work and messier than floating
-
Adhesive costs add up (budget $1 to $2 per square foot for quality glue)
-
Harder to remove if you ever want to change the floor
Method 2: Floating Installation
Floating is where the planks lock together at the edges but are not attached to the subfloor at all. The whole floor sits on top of an underlayment pad and "floats" over the concrete. This is the most DIY-friendly method.
Pros of floating:
-
Fastest installation method by far
-
No glue mess and no special tools beyond a saw and tapping block
-
Easier to replace individual boards if damage occurs
Cons of floating:
-
Can feel slightly hollow or spongy underfoot compared to glue-down
-
Requires a separate moisture barrier underlayment over concrete
-
Not all engineered hardwood is rated for floating (check the manufacturer specs)
Proprietary click-lock systems enable floating installations that can cut labor time by more than half compared to traditional methods. If you are a first-timer, this is probably your best bet.
Choosing the Right Cheap Hardwood Flooring for the Job
Now let us talk about what to actually buy. Not all engineered hardwood is created equal, and when you are installing over concrete, you need to pay attention to construction quality.
Let me throw this out there. Our engineered products from the company that makes these products is second to none as far as quality and construction. We carry a range of options at wallet-friendly prices that work beautifully over concrete slabs.
Here are some options to consider:
|
Product |
Species |
Price/Sq Ft |
Best For |
|---|---|---|---|
|
Red Oak |
$1.39 |
Budget-conscious glue-down over concrete |
|
|
Noble's Way Winter River |
White Oak |
$1.99 |
Light, modern look in basements |
|
Canyon Elements Cedar Creek |
White Oak |
$2.49 |
Wide plank look over larger concrete areas |
|
Hickory Saddle (Engineered) |
Hickory |
$1.49 |
Maximum durability for high-traffic slab homes |
|
Red Oak Natural (Engineered) |
Red Oak |
$1.29 |
Lowest price point for first quality wood |
Our Blue Label engineered hardwood is a particular favorite for concrete installations. The Blue Label grade uses a sawn-face veneer with an eight-ply core, giving you authentic wood appearance with maximum dimensional stability.
Now, I need to give you a straight answer about something. If you are looking at our absolute lowest prices, some of those products may be what we call cabin grade or builder grade. This motley collection of engineered wood flooring may consist of slight manufacturing defects, natural imperfections like knots or mineral streaks, and lots of short boards.
That is not a bad thing. Those character marks give your floor personality, and the price is unbeatable. But you need to know what you are buying so you can plan your installation accordingly and order extra material (usually 10 to 15 percent more than your square footage).
Standard industry practice allows for up to 5% of shipped flooring to have defects anyway, so even with first quality product you should be ordering extra. With cabin grade, bump that to 15 percent.
Engineered Hardwood vs Vinyl Plank Flooring Over Concrete: Which Saves More?
This is a question we get all the time. If you are installing over concrete, should you go with engineered hardwood or luxury vinyl plank? Let me give you the honest comparison.
Vinyl plank flooring is fully waterproof and virtually indestructible. It handles moisture without any testing, installs as a floating floor with click-lock edges, and costs as little as $1.79 per square foot for a product like Claire's Cove Mountain Path with a 12 mil wear layer.
Material pricing per square foot varies dramatically depending on grade and quality, from budget moisture barriers to premium wide-plank flooring.
But here is the thing. The shiny finish on vinyl does not hold up in a "life happens" type of home the same way real wood does. And vinyl plank does not add resale value to your home the way hardwood does.
Engineered hardwood gives you genuine wood grain, the ability to sand and refinish, and that warm, authentic feel underfoot. It costs more upfront and requires more prep work over concrete, but it pays you back in home value and longevity.
Our recommendation? If your concrete subfloor passes moisture testing and you want real wood, go engineered. If you are dealing with a basement that has known water issues, waterproof vinyl plank flooring is the smarter play.
For homeowners who want the best of both worlds, engineered hickory is incredibly tough. Hickory hardwood flooring is one of the most durable domestic wood species you can find, and it stands up to the kind of abuse that comes with pets and kids.
Did You Know?
Estimated installation labor cost for hardwood projects in 2026 runs $8.00 to $9.00 per square foot, reflecting a significant increase that makes DIY installation more valuable than ever.
Source: Steller Floors
That is real money. On a 500 square foot room, professional installation alone would cost you $4,000 to $4,500 in 2026. Buy your engineered hardwood from us at $1.29 to $2.49 per square foot, do the install yourself, and you are saving thousands while still getting American-made quality.
Common Mistakes to Avoid
Let me save you some pain. Here are the mistakes we see DIYers make over and over again when installing over concrete.
-
Skipping the moisture test. This is number one for a reason. Concrete that looks dry can still emit enough moisture to buckle a wood floor. Test it or regret it.
-
Not acclimating the wood. Those boxes need to sit in the room for at least 72 hours at normal living conditions. Open the boxes, lay the planks out if you can, and let the wood breathe.
-
Ignoring the flatness of the slab. If your concrete has dips or humps, your floor will squeak, flex, and eventually fail. Spend the time leveling it first.
-
Using the wrong adhesive. Not all glue is rated for use over concrete with moisture issues. Use a moisture-control adhesive specifically designed for concrete subfloors.
-
Not ordering enough material. Always order 5 to 15 percent extra depending on grade. Running out mid-install and waiting for another shipment is a headache you do not want.
-
Installing below grade without a vapor barrier. If you are putting engineered hardwood in a basement over concrete, you absolutely need a vapor barrier or moisture-rated adhesive. No exceptions.
One more thing about basements and radiant heat. If your concrete slab has radiant heating built in, engineered hardwood is actually the best choice because it handles temperature fluctuations better than solid wood. Check out our guide on hardwood installation over radiant heat for the specifics on that setup.
Finding Discount Flooring Without Sacrificing Quality
Here is where I get to brag a little, but I will keep it humble. We have spent decades building relationships with American manufacturers, and sometimes we are not even allowed to disclose who makes some of our products. That is how we get such killer deals.
When you are shopping for engineered hardwood to install over concrete, here is what to look for to get the best discount without buying junk:
-
Look for discontinued colors. Manufacturers discontinue shades all the time, and we buy them up at a fraction of the original cost. The wood quality is identical, only the color is being phased out.
-
Consider builder grade or cabin grade. These products have more short boards and natural character marks, but the construction quality is the same as first quality. You just need to be willing to work with shorter pieces.
-
Buy direct from a family operation. We cut out the distributor and retailer markups. That is how we sell first quality engineered hardwood starting at $1.29 per square foot.
-
Check for made in the USA products. American-made flooring supports our economy and often meets higher manufacturing standards than imports at the same price point.
A red Oak floor will have a pink tint when it comes out of the box but a month of sunbathing eliminates that, resulting in a warmer tone. Do not let the initial color scare you off, especially if you are getting a discount on it.
Step-by-Step: The Full Break Down
Alright, let me walk you through the actual installation process. I am going to cover the glue-down method since that is the most common approach for concrete subfloors.
What You Will Need
-
Engineered hardwood planks (with 5-15% extra for waste)
-
Moisture-control adhesive rated for concrete
-
Vapor barrier (if your adhesive does not include one)
-
Trowel (check adhesive manufacturer for notch size)
-
Table saw or miter saw for cutting planks
-
Tapping block and pull bar
-
Spacers (1/2 inch for expansion gaps)
-
Tape measure, chalk line, and pencil
-
Knee pads (trust me on this one)
The Installation Steps
Step 1: Test the moisture. Do your calcium chloride test or use a concrete moisture meter. If readings exceed the flooring manufacturer's limits, install a vapor barrier first.
Step 2: Acclimate the flooring. Stack the boxes in the installation room for at least 72 hours with HVAC running at 60-70 degrees F and 35-55% humidity.
Step 3: Plan your layout. Snap a chalk line parallel to your longest wall, about the width of one plank plus 1/2 inch for expansion. Work from the most visible wall toward the least visible.
Step 4: Spread the adhesive. Work in sections no larger than what you can cover in the adhesive's open time (usually 30 to 60 minutes). Use the trowel size recommended by the adhesive manufacturer.
Step 5: Lay your first row. Place the groove side facing the wall, with 1/2 inch spacers maintaining your expansion gap. This first row needs to be perfectly straight because everything else follows it.
Step 6: Continue laying planks. Stagger the end joints by at least 6 inches between rows. Press each plank firmly into the wet adhesive and check for tight seams.
Step 7: Cut the last row. Measure and rip-cut your final row to width, remembering to leave the 1/2 inch expansion gap on the wall side.
Step 8: Let it cure. Stay off the floor for the adhesive's recommended cure time, typically 24 to 48 hours. Keep traffic minimal for the first week.
Conclusion
Learning this new skill is one of the smartest and cost saving DIY projects you can take on in 2026. With professional labor costs climbing past $8 per square foot, doing it yourself saves you thousands of dollars while giving you a genuine wood floor that adds real value to your home.
The keys are simple. Test your moisture, acclimate your wood so allowing it to breath in your home, prep your slab, try a vapor retarder, and use the right adhesive or polyethylene film underlayment. Whether you choose our Blue Label engineered hardwood at $1.39 per square foot or a first quality white oak at $1.99, you are getting American-made quality without the big-box markups.
We are the Cook family, and we have been helping folks like you skip the headaches and get straight to a floor they love for over 50 years. Grab some samples, test that slab, and get to work. Your new floor is waiting.
Frequently Asked Questions
How much does it cost to install engineered hardwood over concrete in 2026?
Professional installation labor runs about $8.00 to $9.00 per square foot in 2026, on top of material costs. By doing it yourself with our discount engineered hardwood starting at $1.29 per square foot, a 500 square foot room could cost you under $1,000 in materials instead of $5,000 or more with professional installation.
Is floating or glue-down better for installing engineered hardwood over concrete?
Glue-down provides a more solid, permanent feel and better moisture protection, making it the preferred method for most concrete subfloor installations. Floating is faster and easier for DIYers but requires a compatible click-lock product and a separate vapor barrier over the concrete.
Do I need a moisture barrier under engineered hardwood on concrete?
Yes, you always need moisture protection when installing engineered hardwood over concrete subfloors. This can be achieved through a moisture-rated adhesive that doubles as a vapor barrier, or through a separate vapor barrier underlayment if you are doing a floating installation.
Can I install engineered hardwood in a basement over a concrete slab?
You can install engineered hardwood in a below-grade basement over concrete, but moisture testing is absolutely critical and a vapor barrier is mandatory. If your basement has any history of water intrusion, vinyl plank flooring may be the smarter, safer choice since it is fully waterproof.
How long does engineered hardwood need to acclimate before installing over concrete?
Engineered hardwood should acclimate in the installation room for a minimum of 72 hours, with the HVAC running at normal occupancy conditions of 60-70 degrees F and 35-55% relative humidity. The boxes should remain unopened and stacked off the floor during this period.